
React Native로 애플리케이션을 만들 때 icon은 필수적이다. react native에서 icon을 사용하려면 몇가지 설정이 필요하다.
1. React Native Icon 설치하기
npm i react-native-vector-icons
2. Xcode 설정하기 (iOS 설정)
프로젝트의 ios 폴더 안의 .xcworkspace 를 Xcode로 실행한다.
해당 프로젝트 이름의 폴더에 new folder를 추가하고 이름을 Fonts로 한다.

새롭게 추가한 Fonts 폴더안에 node_modules/react-native-vector-icons/Fonts 하위에 있는 모든 폰트를 추가한다. (중요!)
3. Info.plist 파일 설정
해당 프로젝트의 ios 폴더 안의 Info.plist 파일을 열고 다음의 내용을 추가한다.
<key>UIAppFonts</key>
	<array>
		<string>Zocial.ttf</string>
		<string>SimpleLineIcons.ttf</string>
		<string>Octicons.ttf</string>
		<string>MaterialCommunityIcons.ttf</string>
		<string>Materiallcons.ttf</string>
		<string>Ionicons.ttf</string>
		<string>Foundation.ttf</string>
		<string>Fontisto.ttf</string>
		<string>Feather.ttf</string>
		<string>FontAwesome5_Brands.ttf</string>
		<string>FontAwesome5_Regular.ttf</string>
		<string>FontAwesome%_Solid.ttf</string>
		<string>Evillcons.ttf</string>
		<string>Entypo.ttf</string>
		<string>AntDesign.ttf</string>
		<string>FontAwesome.ttf</string>
	</array>
4. PodFile 설정
ios 폴더 안을 보면 Podfile이라는 파일이 있는데, 그 안의 use_flipper! 또한 아래와 같이 수정해준다.
use_flipper!({ 'Flipper' => '0.74.0' })

  post_install do |installer|
    flipper_post_install(installer)
5. 마무리
터미널에서 ios 폴더로 들어가서 설치한다.
cd ios
pod install
6. Error 발생 및 해결과정
위의 과정을 다 진행했음에도 불구하고, 나에게는 에러가 발생했는데, Xcode 에서 발생한 문제였다. 에러메세지는 다음과 같았다.
error: Mutiple commands produce
stack overflow에서 검색을 해보니, 이는 Xcode 안에서 multiple Plist 가 존재하는 경우 발생하는 에러라고 했다.
이를 해결하기 위해 ios 폴더 안의 .xcworkspace 를 Xcode로 다시 실행하고, Build phases라는 항목에 들어간다.
그 안에 'Copy Bundle Resources' 를 클릭하고 그 안의 info.plist 를 지운다.
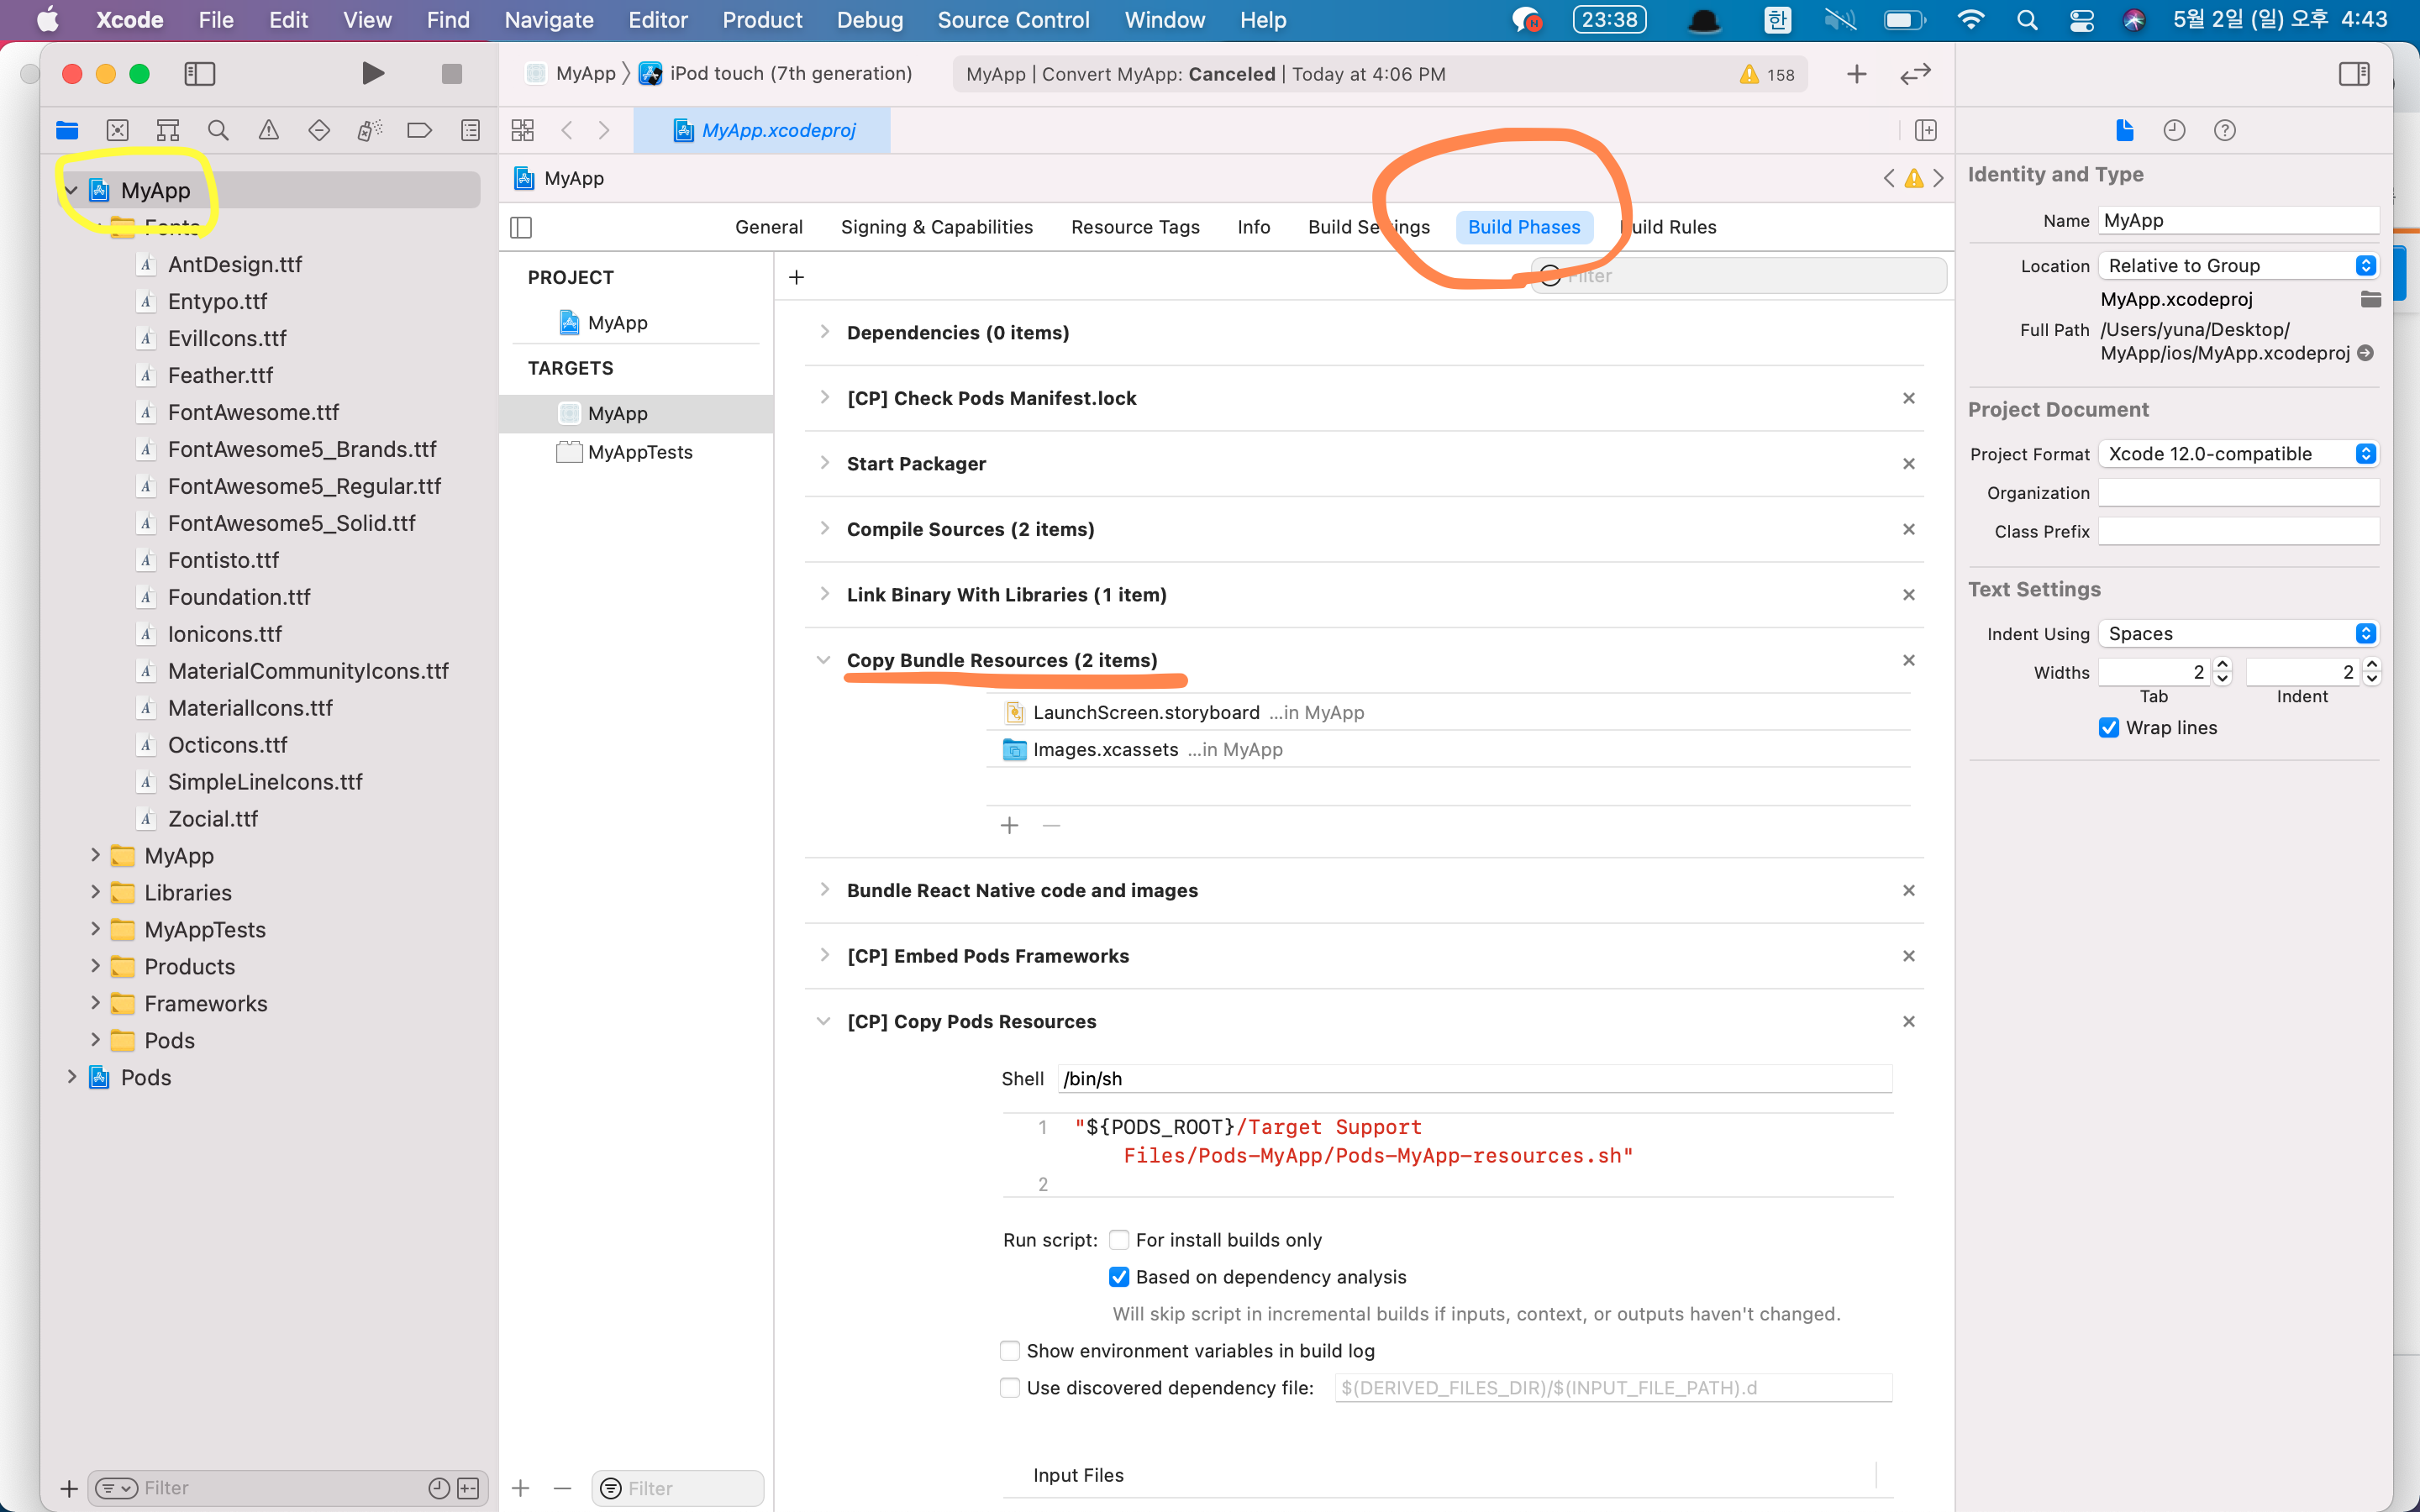
이렇게 info.plist를 지우고 나니, build가 성공적으로 이루어졌다!
매번 에러를 마주하다 보니 이제는 에러가 발생하면 당황하지 않고 에러메세지를 복사해서 구글에서 검색해 보는게 당연하게 되었다.ㅋㅋ 이런 경험들도 나중에 다 도움이 되는 경험이겠지만, 에러없이 모든게 원하는대로 잘 설치가 되면 얼마나 좋을까 라며 헛된 바람을 갖게 된다.
5. 사용하기
Icon을 import 하고 name property 에 사용할 아이콘을 이름을 넣어주면 끝이다! size와 color도 간편하게 바꿀 수 있다.
import React from 'react';
import {StyleSheet, Text, TouchableOpacity, View} from 'react-native';
**import Icon from 'react-native-vector-icons/AntDesign';**

export default function TodoItem({item, pressHandler}) {
  return (
    <TouchableOpacity onPress={() => pressHandler(item.key)}>
      <View style={styles.item}>
        **<Icon name="delete" size={18} color="#333" />**
        <Text style={styles.itemText}>{item.text}</Text>
      </View>
    </TouchableOpacity>
  );
}

const styles = StyleSheet.create({
  item: {
    padding: 16,
    marginTop: 16,
    borderColor: '#bbb',
    borderWidth: 1,
    borderStyle: 'dashed',
    borderRadius: 10,
    flexDirection: 'row',
  },
  itemText: {
    marginLeft: 10,
  },
});'React Native' 카테고리의 다른 글
| React Native 초기 설정 (0) | 2021.08.28 |
|---|